

Introduction
Most AI image editing tools today rely on text-only prompts to describe what needs to be changed and how it should be modified.
However, when an editing task becomes more complex, writing prompts can quickly become cumbersome. More importantly, text alone is sometimes not precise enough to indicate the exact area of an image that needs to be edited.
For example, suppose I want to make several changes to the image below:
- Make the model hold a specific object
- Change the color of her shoes to red
- Replace her outfit with a specific piece of clothing
- Change the background environment to a café
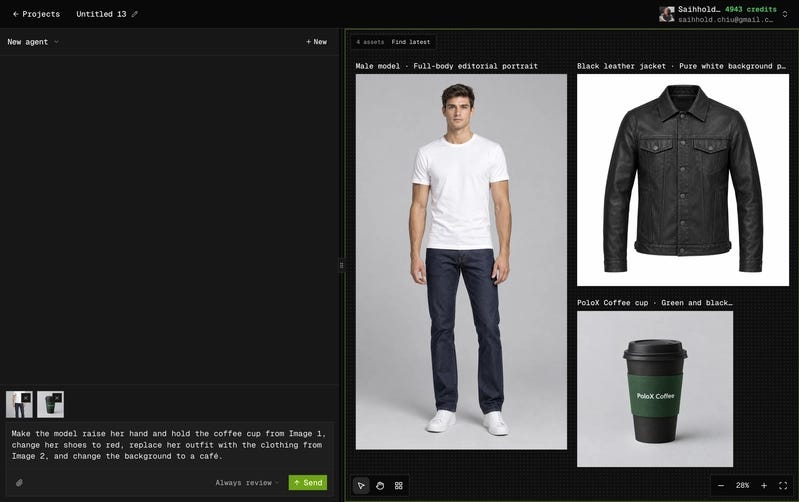
With the traditional text-only approach, I might need to write a prompt like this:
Make the model raise her hand and hold the coffee cup from Image 1, change her shoes to red, replace her outfit with the clothing from Image 2, and change the background to a café.
Annotation & Comment Editing
I simplified this process with a new interaction method.
Instead of writing a long prompt, users only need to place markers directly on the image and briefly describe the desired change in the corresponding input fields.
This makes it possible to tell the model exactly where a change should happen through visual annotations, while using short text instructions to describe what should be changed.
1. Choose an Image Editing Model
So far, this method has worked well with the following image editing models:
- GPT Images 2.5 Flare / Sunburst
- Nano Banana 2
- Seedream 5.0 Pro
Based on these tests, I believe the same approach is also worth testing with newer generations of image editing models released after them.
The following example demonstrates an actual test using GPT Images 2.5 Sunburst in PoloX AI.
The implementation is open source and available on GitHub:
https://github.com/saihhold-zhao/polox_ai
2. Use the Image Annotation Edit Skill
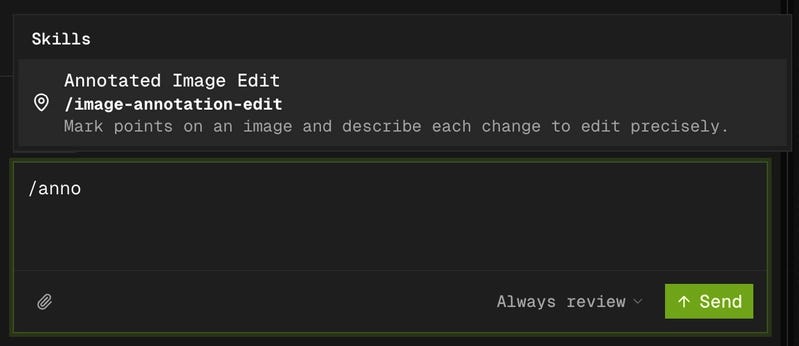
1. Trigger the Skill
Use /annotated-image-edit to trigger the Image Annotation Edit Skill.
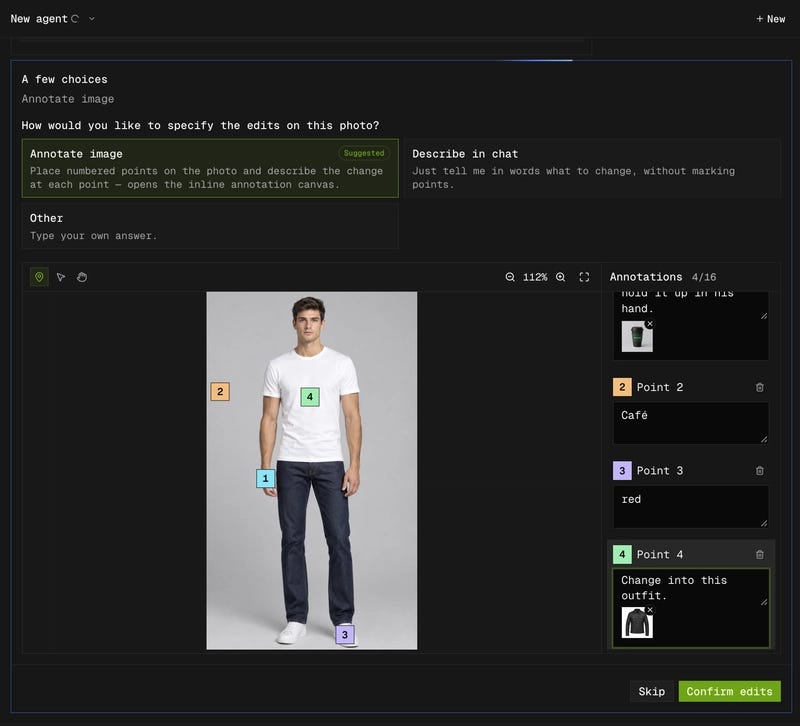
2. Enter Annotation Editing Mode
Select Annotation Editing Mode to open the image annotation tool.
3. Add Markers and Editing Instructions
Place a marker directly on the part of the image you want to modify, then enter a short instruction in the corresponding input field.
For example, if you want to change the shoes to red:
Place a marker on the shoes → Enter “red”
That’s it.
If you want to use a reference image, you can upload it directly in the corresponding input field.
For example, if you want the model to hold a specific coffee cup:
Place a marker on her hand → Enter “raise her hand and hold this” → Upload the coffee cup reference image
This creates a clear relationship between the target location, the editing instruction, and the reference image.
4. Let the Agent Analyze the Annotations
Once all annotations are complete, click Continue.
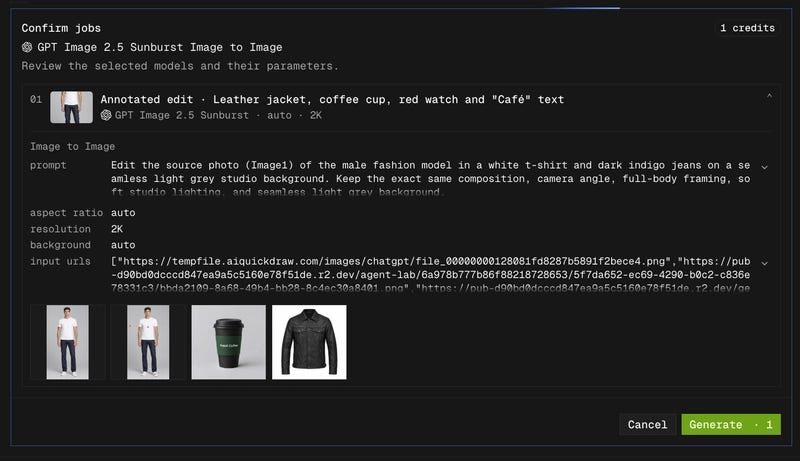
A vision-language model analyzes all of the annotations, and the Agent automatically prepares the parameters and prompt required by the image editing model.
There is one important implementation detail:
The Agent sends two images to the image editing model: the original image and a second version containing the visual annotations.
This means there is no need to worry about annotation markers covering parts of the original image.
The model can use the annotated image to understand where the edits should be applied, while still having access to the clean original image for complete, unobstructed visual information.
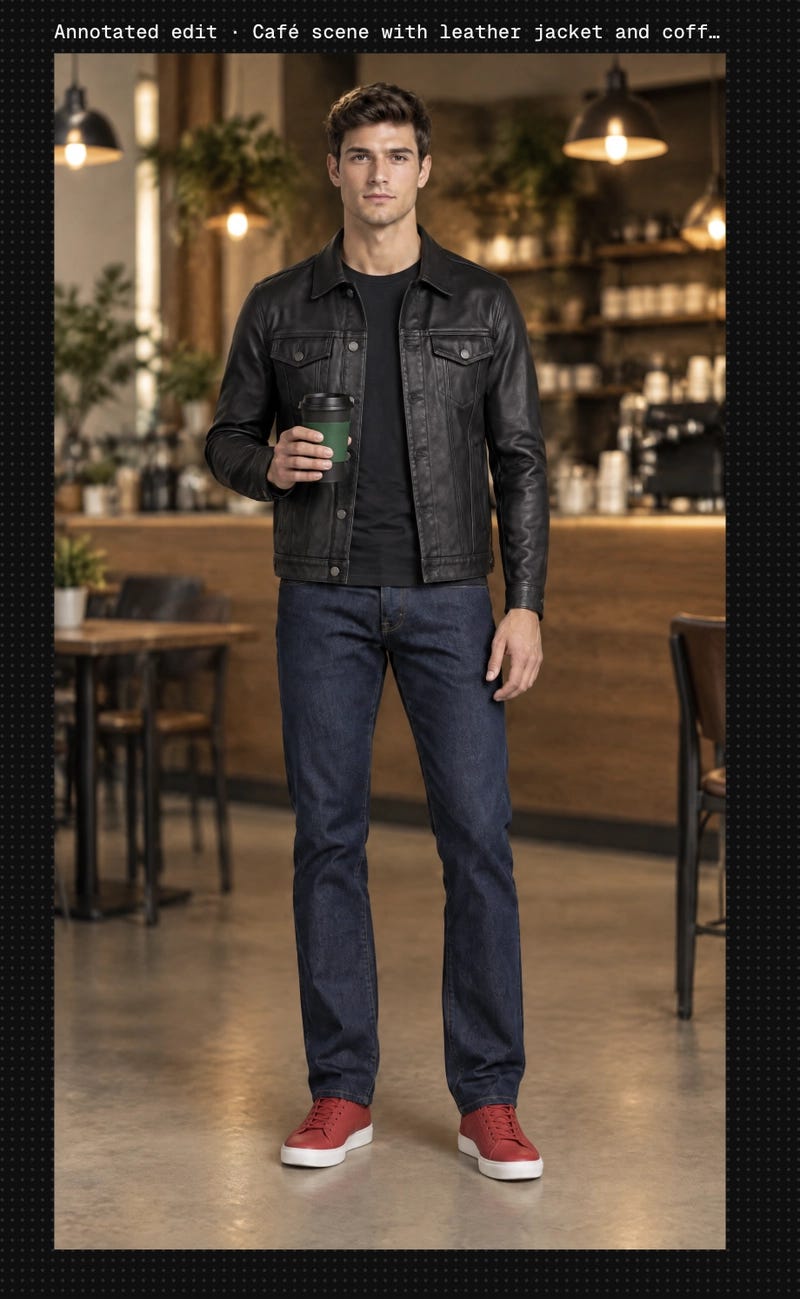
5. Get the Result
After these steps, the image editing model generates the final result based on the editing instructions prepared by the Agent.
Conclusion
This Annotation + Comment approach significantly simplifies the AI image editing workflow.
Instead of writing complicated prompts, users can directly indicate where they want to make a change and briefly describe what they want to change. The Agent then handles prompt construction and parameter configuration automatically.
Try it in PoloX AI, or deploy locally and test the open-source implementation:
https://github.com/saihhold-zhao/polox_ai
Originally published on Medium: Annotation & Comment: A Simpler Approach to AI Image Editing.