
Introduction
Breaking an image into separate layers is one of the most common jobs in design work. You want the subject apart from the backdrop, the text apart from the artwork, and a clean background you can build on.
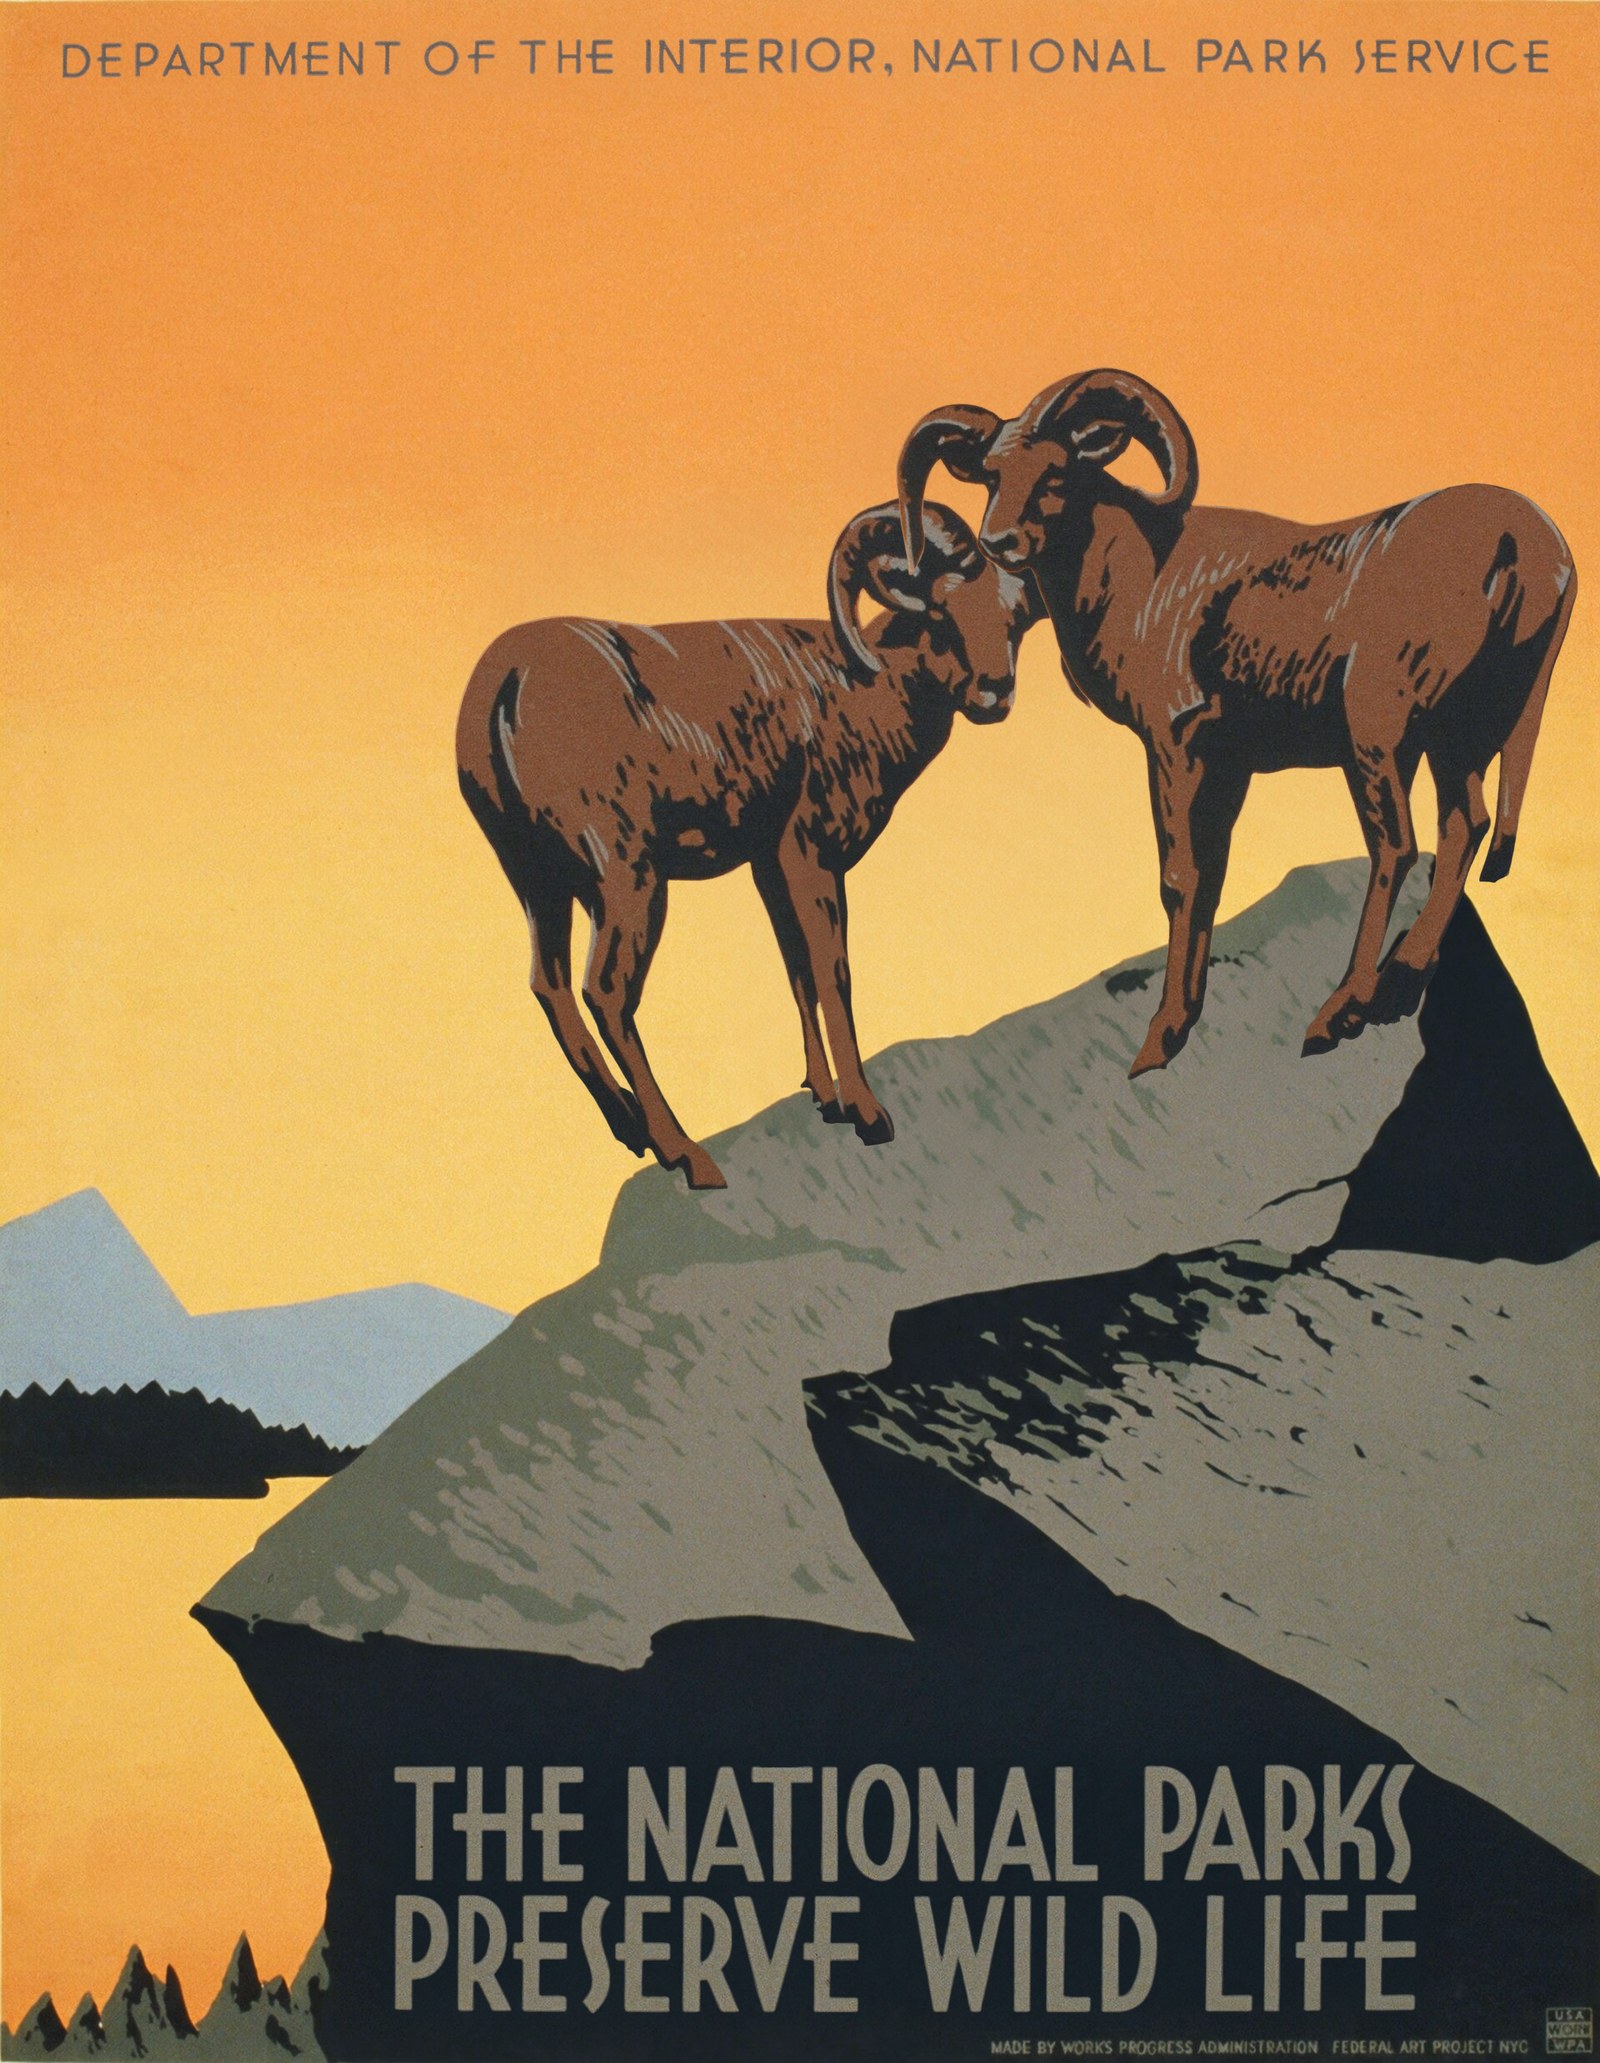
AI layer decomposition can do this in seconds. The hard part is telling the model which parts you mean. Take this 1938 national parks poster. It has two almost identical bighorn rams, a rock, a lake, mountains, a line of small header text and a big title.
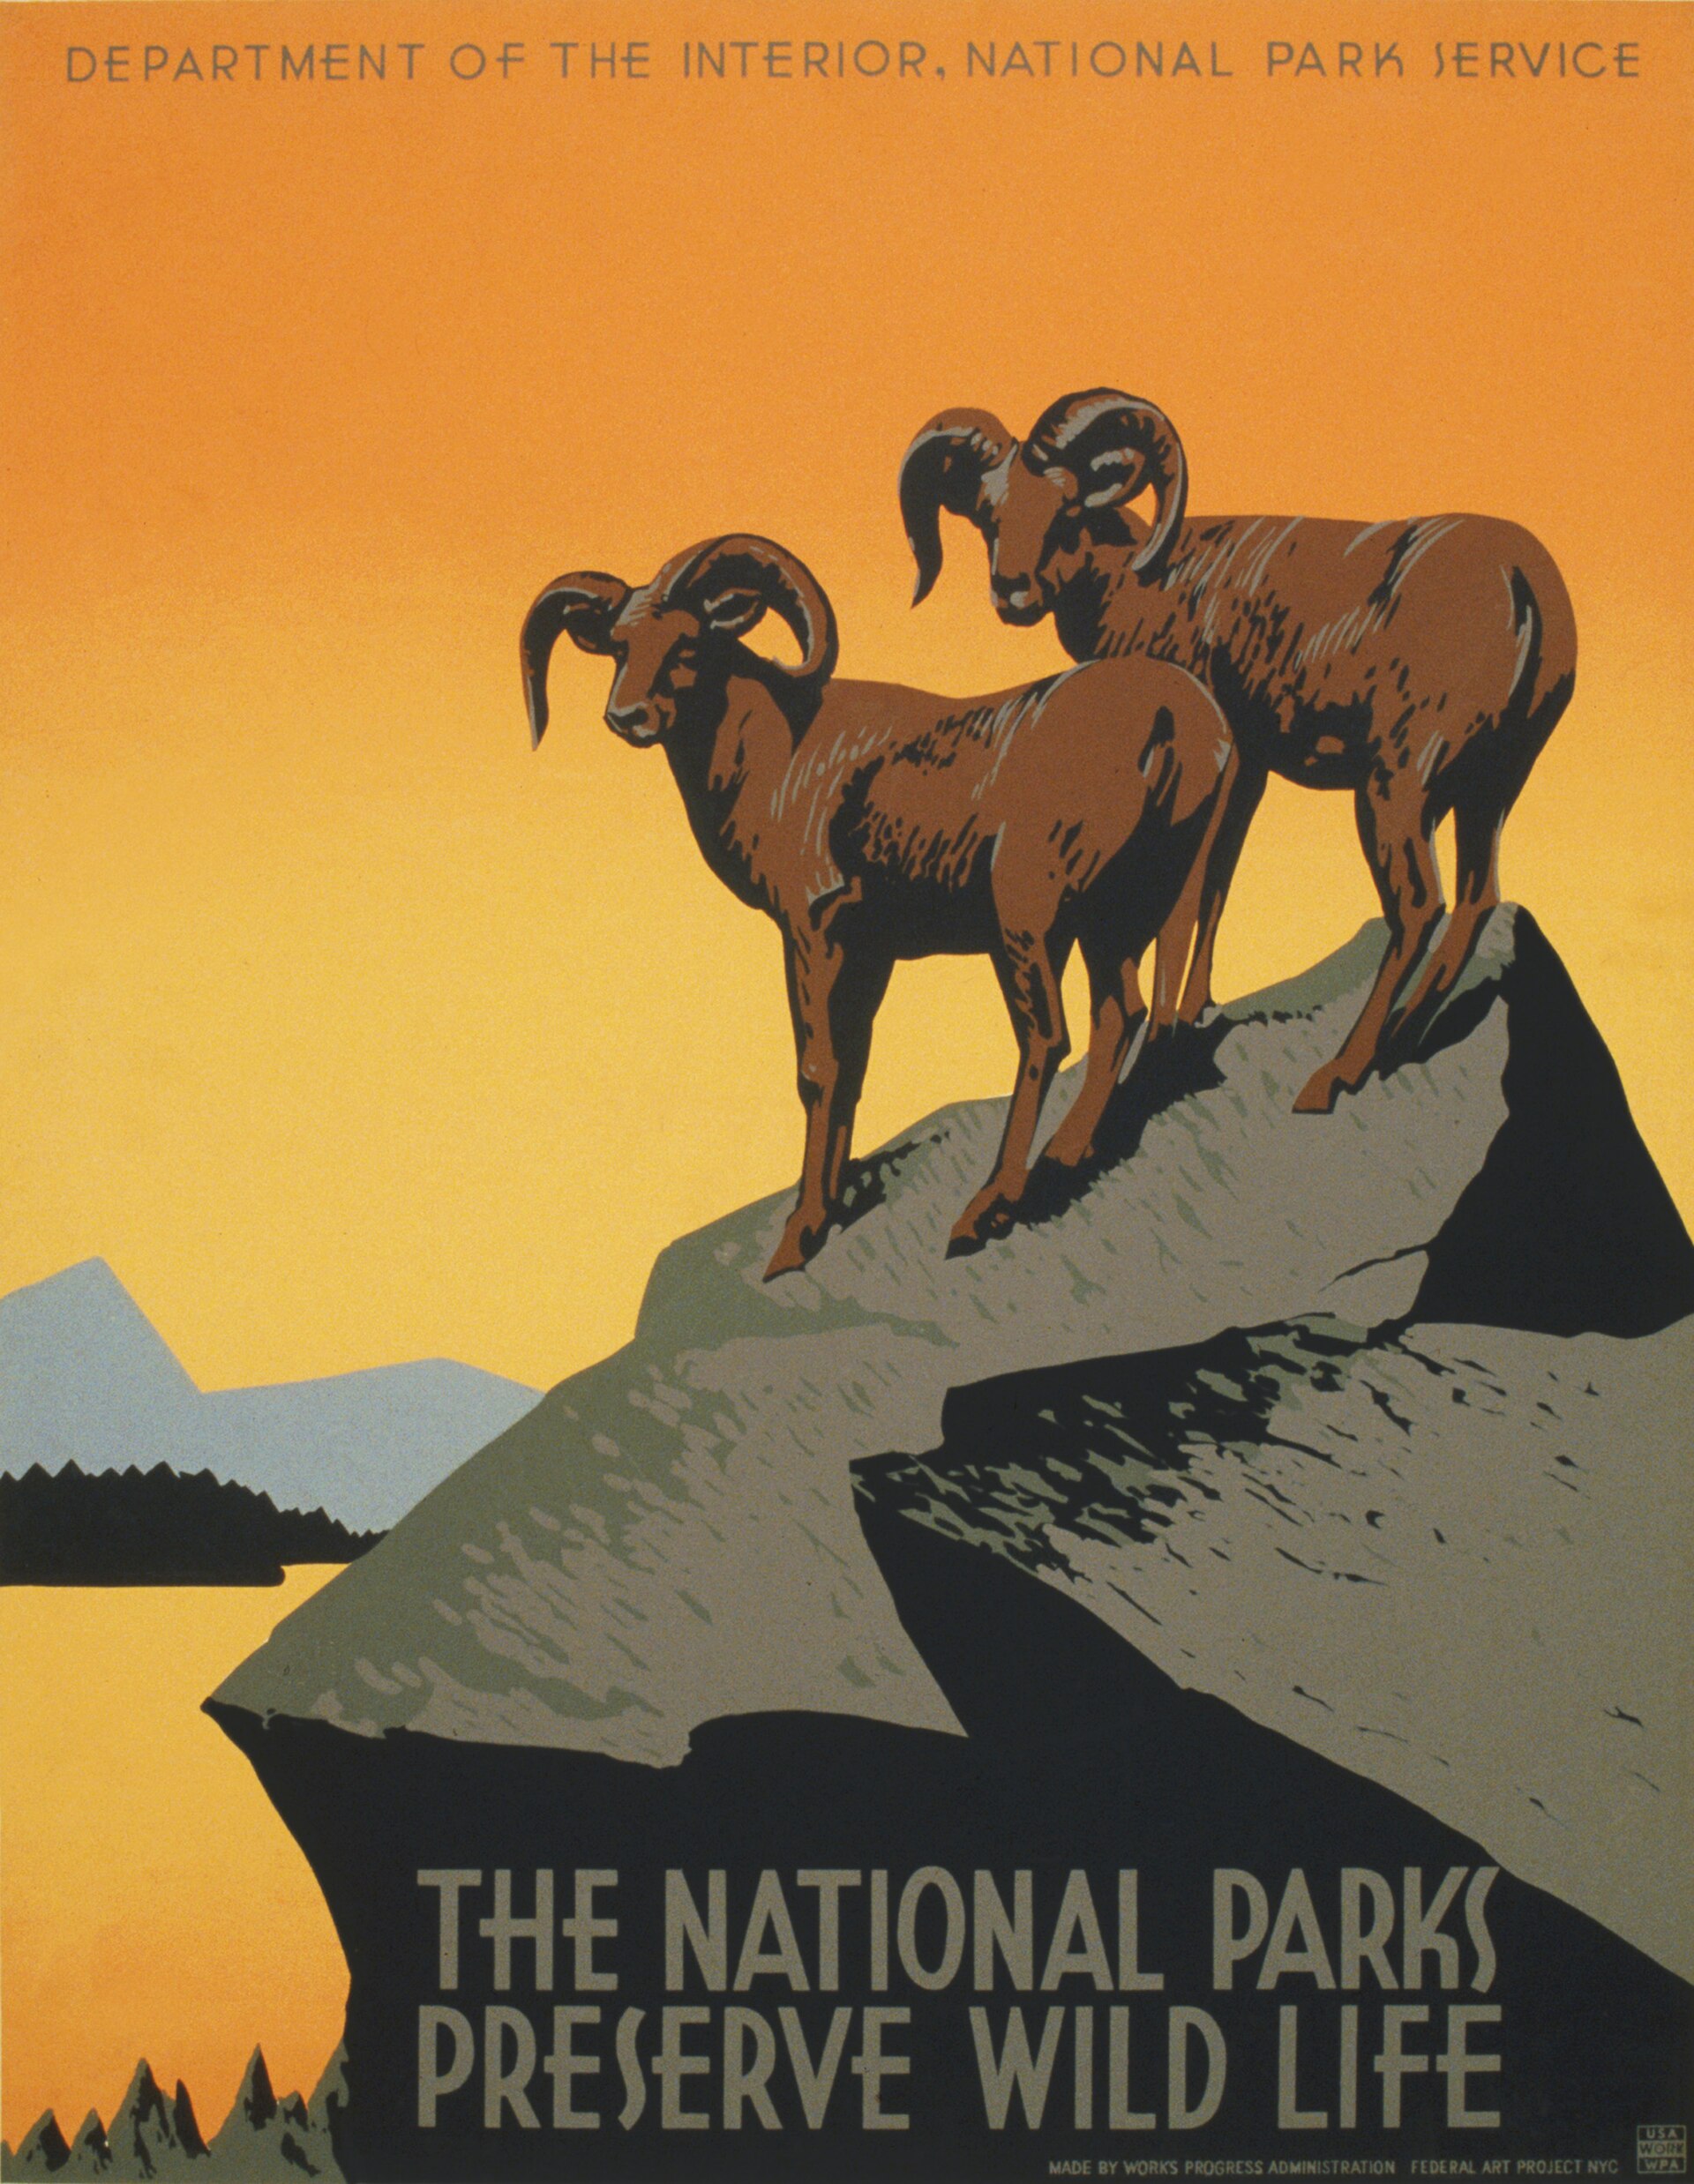
Say you want four layers: each ram on its own, the title, and the header. With text alone, you would write something like "Extract the ram in front on the left, the other ram standing behind it on the right, the large title text at the bottom, and the small line of text at the top." Two rams that look the same, a "front" and a "behind" that overlap, and two different blocks of text. Every one of those words is a chance for the model to merge the rams, swap them, or cut off part of the lettering.
The Image Layer Splitter skill takes a different approach. You draw a box around each target, and PoloX AI does the describing for you.
Drawing Boxes vs. Writing Descriptions
Text is good at saying what something is. It is bad at saying where it is, especially when an image contains similar objects. A box solves that in one gesture.
Pointing at a target: Text only: Describe its position in words ("the ram behind, on the right"). Boxes: Draw a box around it.
Similar objects: Text only: Easy to mix up; needs extra words to tell them apart. Boxes: One box per object, nothing to mix up.
Many targets: Text only: The prompt gets longer and harder to check. Boxes: Up to 16 boxes, a second each.
Knowing what the model understood: Text only: You find out after generation. Boxes: You review a target list before anything is generated.
Fixing a mistake: Text only: Rewrite the prompt and run it again. Boxes: Adjust the boxes before confirming.
Here is the key detail: your boxes are not simply passed to the model as coordinates. When you confirm your regions, the agent looks at the original image together with a preview of your boxes, works out what is inside each one, and writes a precise English description of every target, covering both what it is and where it sits. Those descriptions are what the layer model receives.
So the hardest part of the text approach, describing every target accurately, still happens. It is just done by the agent instead of by you.
How to Use Image Layer Splitter
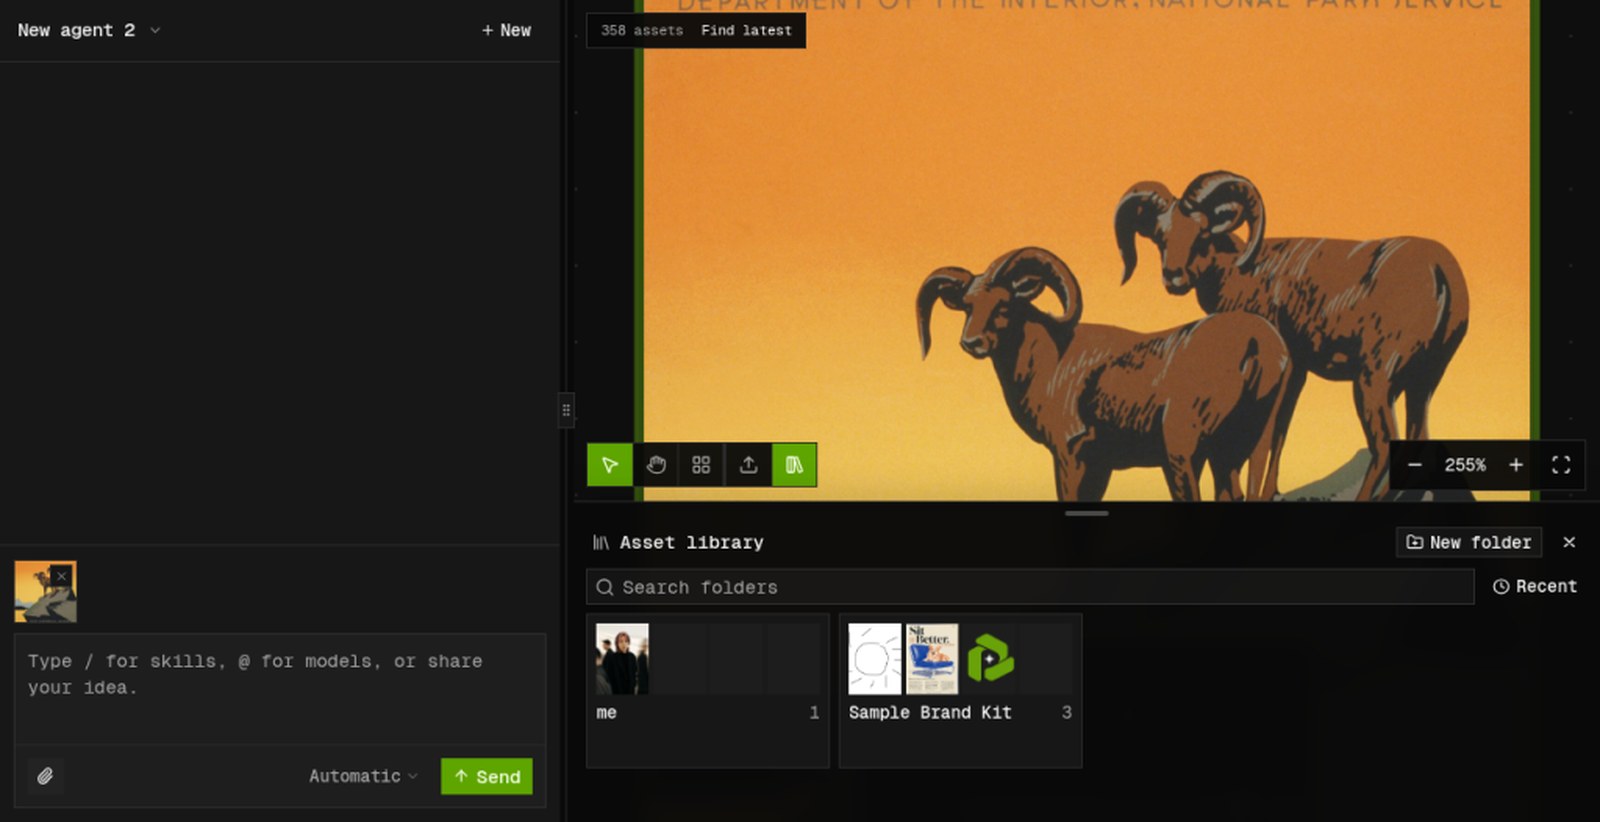
Step 1: Start the skill and add your image
Open a project in PoloX AI, type /image-layer-splitter in the agent chat, and upload your image. JPEG, PNG, WEBP, GIF, AVIF and BMP files up to 10 MB are supported. If the image is already on your canvas, you can click Split layers on the image toolbar instead.
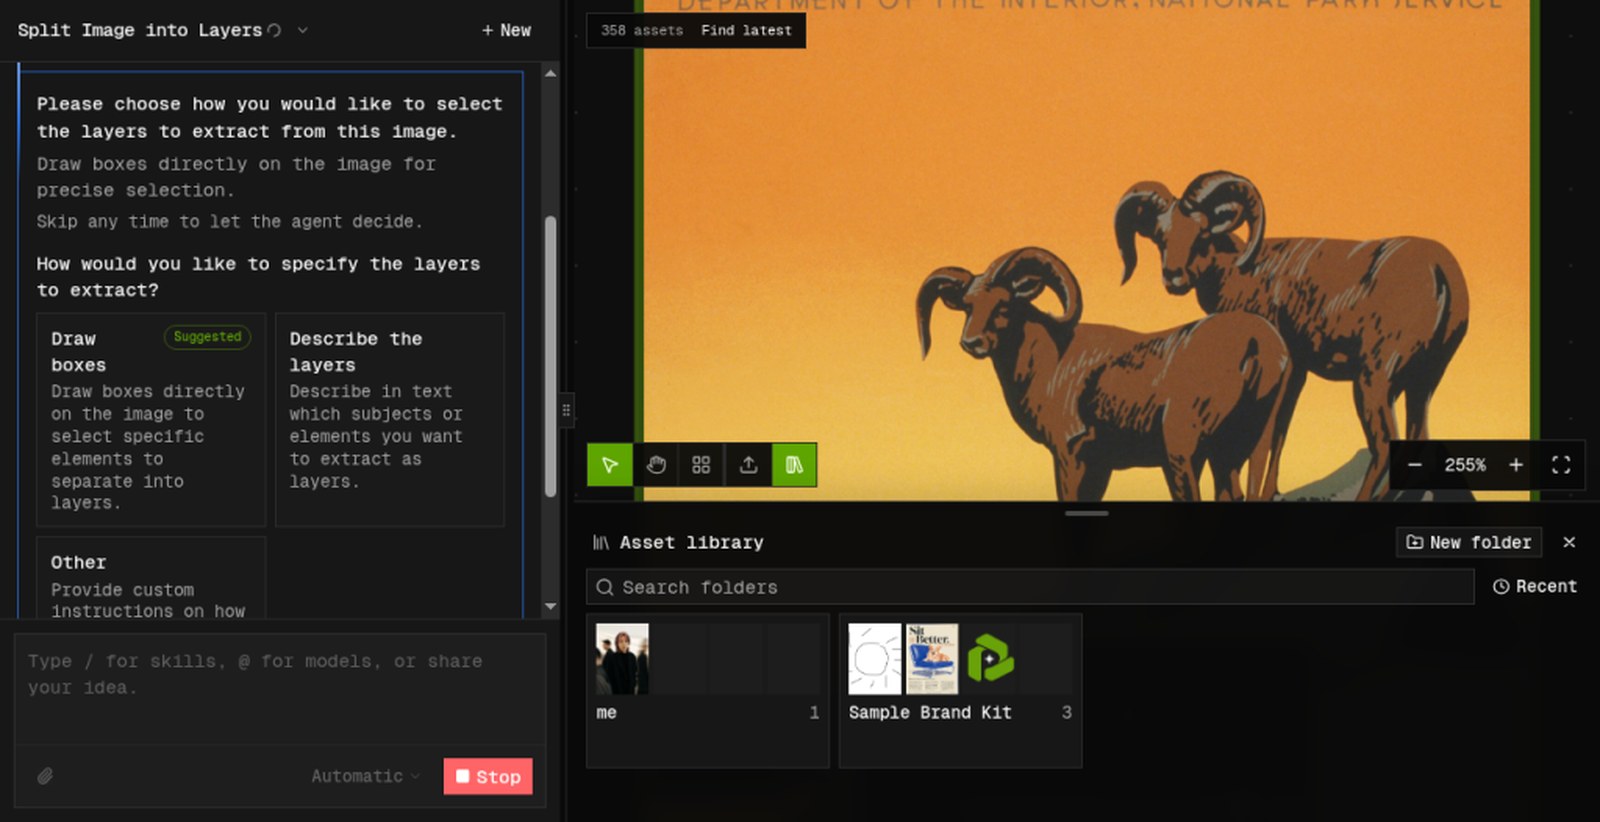
Step 2: Choose how to mark the layers
PoloX asks how you want to specify the layers. Draw boxes is the suggested option for precise selection. You can also pick Describe the layers and explain in text, or choose Other to give custom instructions.
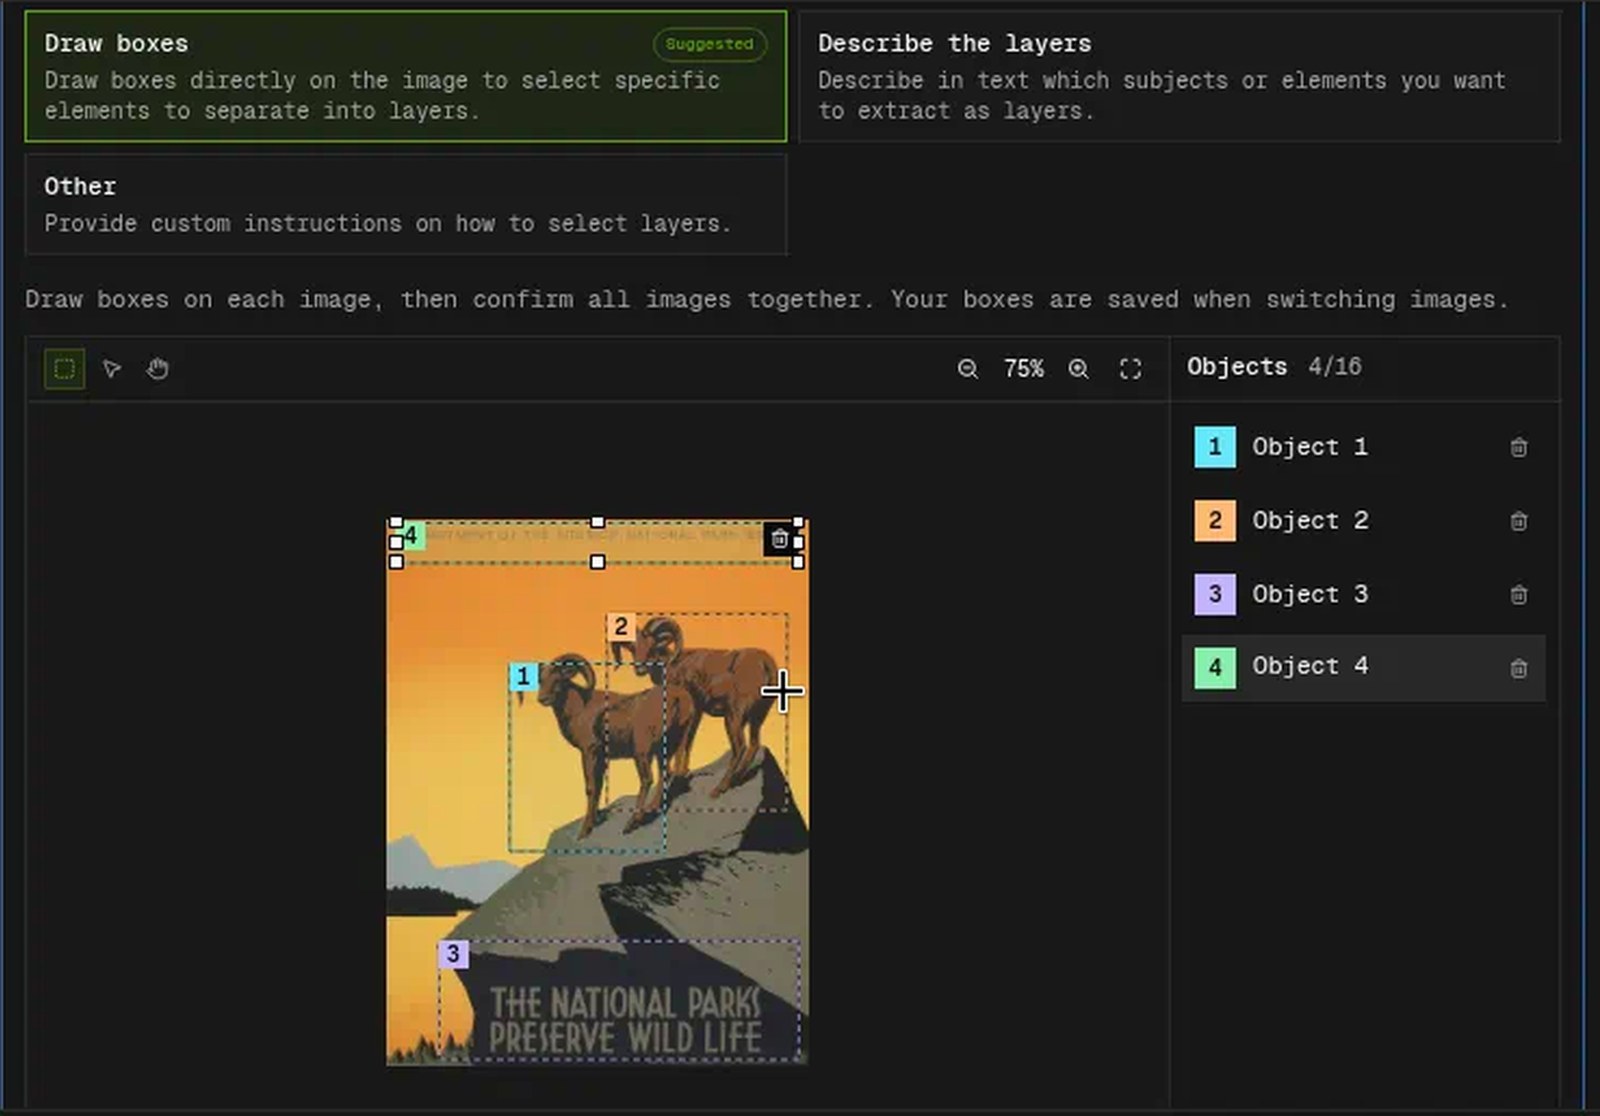
Step 3: Draw your boxes
An editor opens right in the chat. Draw a box around each part you want as its own layer, up to 16 per image, and each box appears in the Objects list on the right. For the poster we drew four: the front ram, the back ram, the title and the header.
Step 4: Review the target list
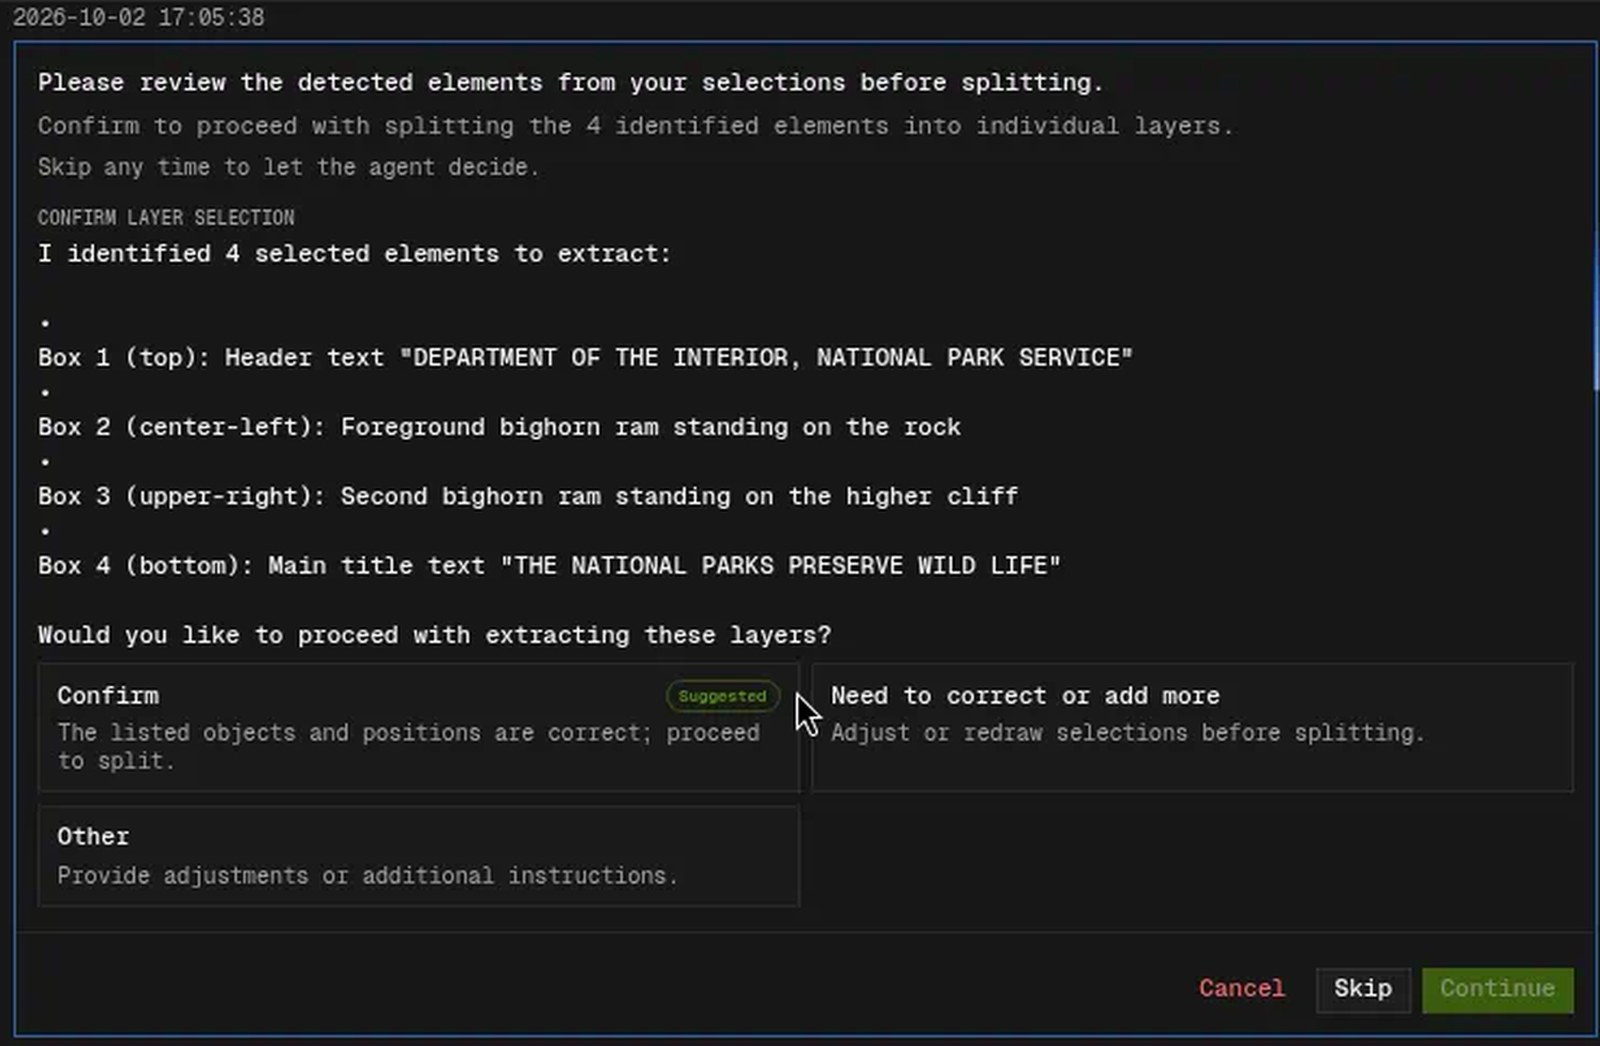
Before generating anything, the agent tells you what it found in each box, named by appearance and position. For our poster it returned:
Box 1 (top): Header text "DEPARTMENT OF THE INTERIOR, NATIONAL PARK SERVICE"
Box 2 (center-left): Foreground bighorn ram standing on the rock
Box 3 (upper-right): Second bighorn ram standing on the higher cliff
Box 4 (bottom): Main title text "THE NATIONAL PARKS PRESERVE WILD LIFE"
It told the two rams apart and even read the lettering, without us typing a single word. If something is off, choose to correct it or add more targets and you go back to marking.
Step 5: Get your layers
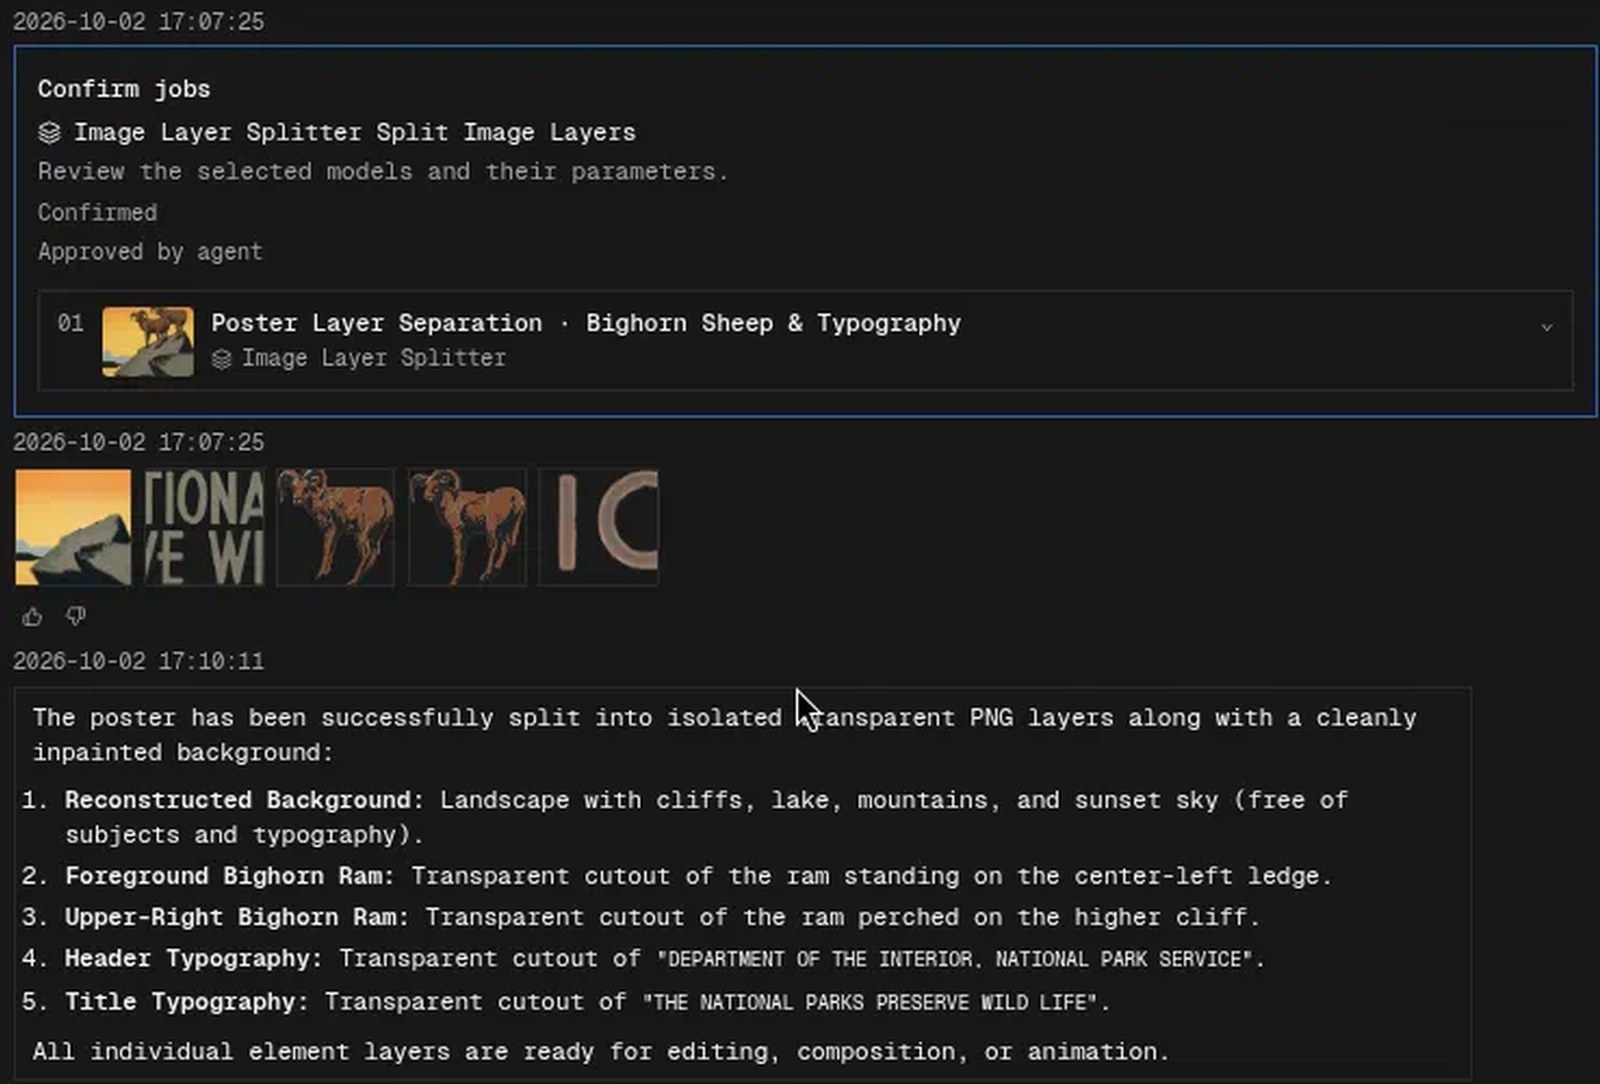
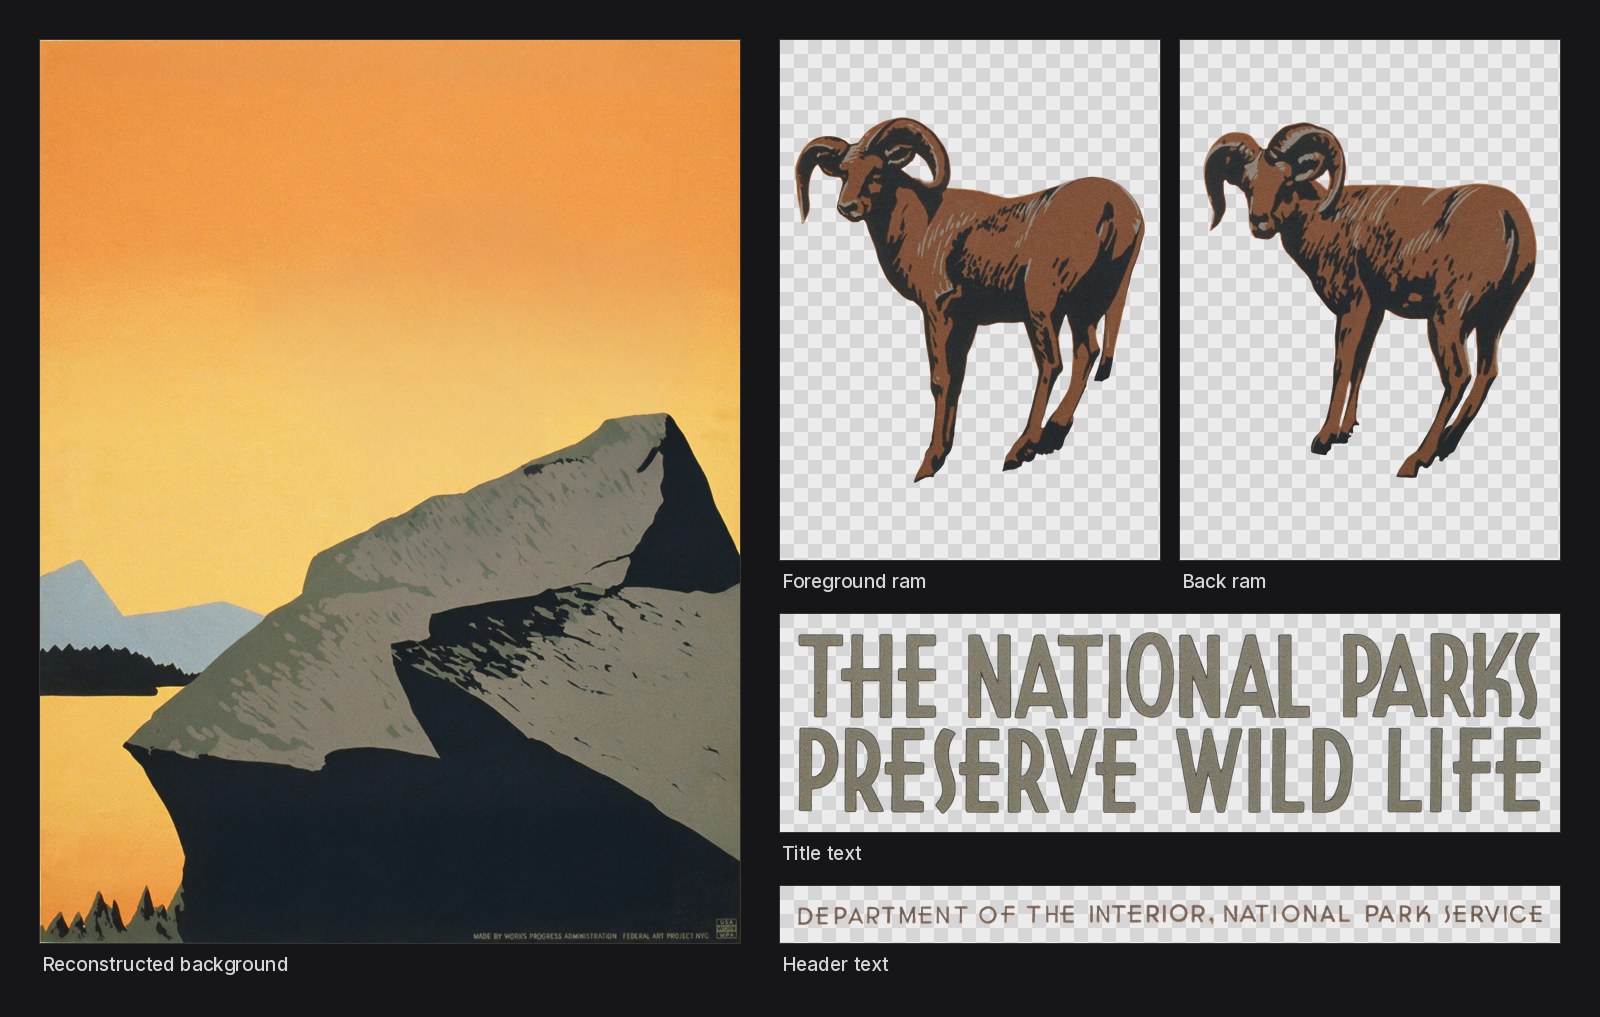
Once you confirm, PoloX splits the image. You get one transparent PNG for every target plus a separate background layer, with the areas behind the removed parts filled in. All layers land on your canvas, where you can download them one by one or export them together as a ZIP.
What Happens Under the Hood
Boxes become descriptions. The agent reads the original image and the boxed preview together, then writes a "what and where" description for each target.
Nothing is generated before you confirm. Uploading an image does not mean you want everything pulled out, so the agent always checks the target list with you first.
Layer decomposition by Seedream 5.0 Pro. The split itself is done by ByteDance Seedream 5.0 Pro Layerize, which returns 2K transparent layers.
The background is reconstructed. The background layer is not a copy with holes in it. The space behind each removed part is filled in, so it works on its own.
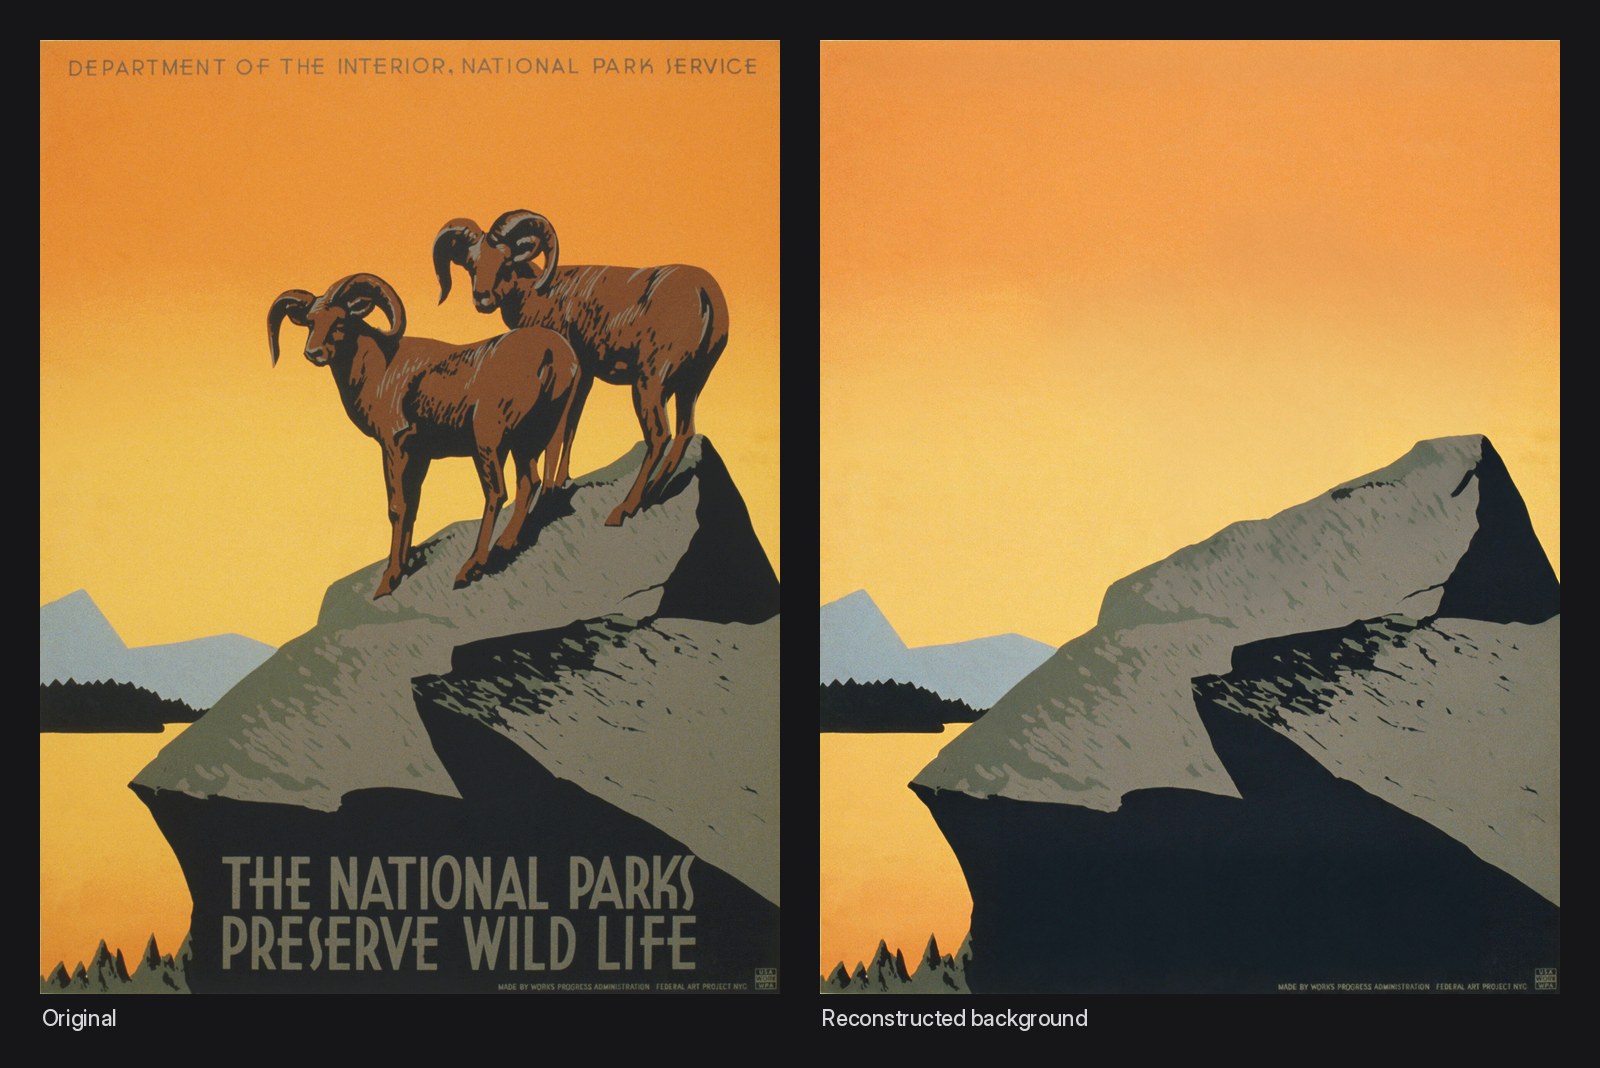
Image Layer Splitter vs. Background Removal
A background remover gives you one result: the subject, cut out. Image Layer Splitter gives you as many layers as you mark, up to 16 targets plus the background, in a single run. That makes it the right tool whenever you want to rework a design rather than isolate one thing, for example:
Moving, resizing or flipping elements in an existing poster or ad
Pulling the lettering off a design so you can replace or translate it
Getting a clean background plate to build a new layout on
Because every element is its own layer, a new version of the poster is just a matter of moving layers around:
Conclusion
Describing which parts you want is the slowest and least reliable step in AI layer extraction. Image Layer Splitter replaces it with something faster: draw a box, check the list, confirm. The agent writes the descriptions, the model does the split, and you get clean transparent layers ready for your next design.
Try it now in PoloX AI with /image-layer-splitter, or check out the project on GitHub.
Example image: "The National Parks Preserve Wild Life," WPA Federal Art Project poster, ca. 1938, public domain via Wikimedia Commons.
Reviewed and verified as accurate by founder Saihhold Zhao.